
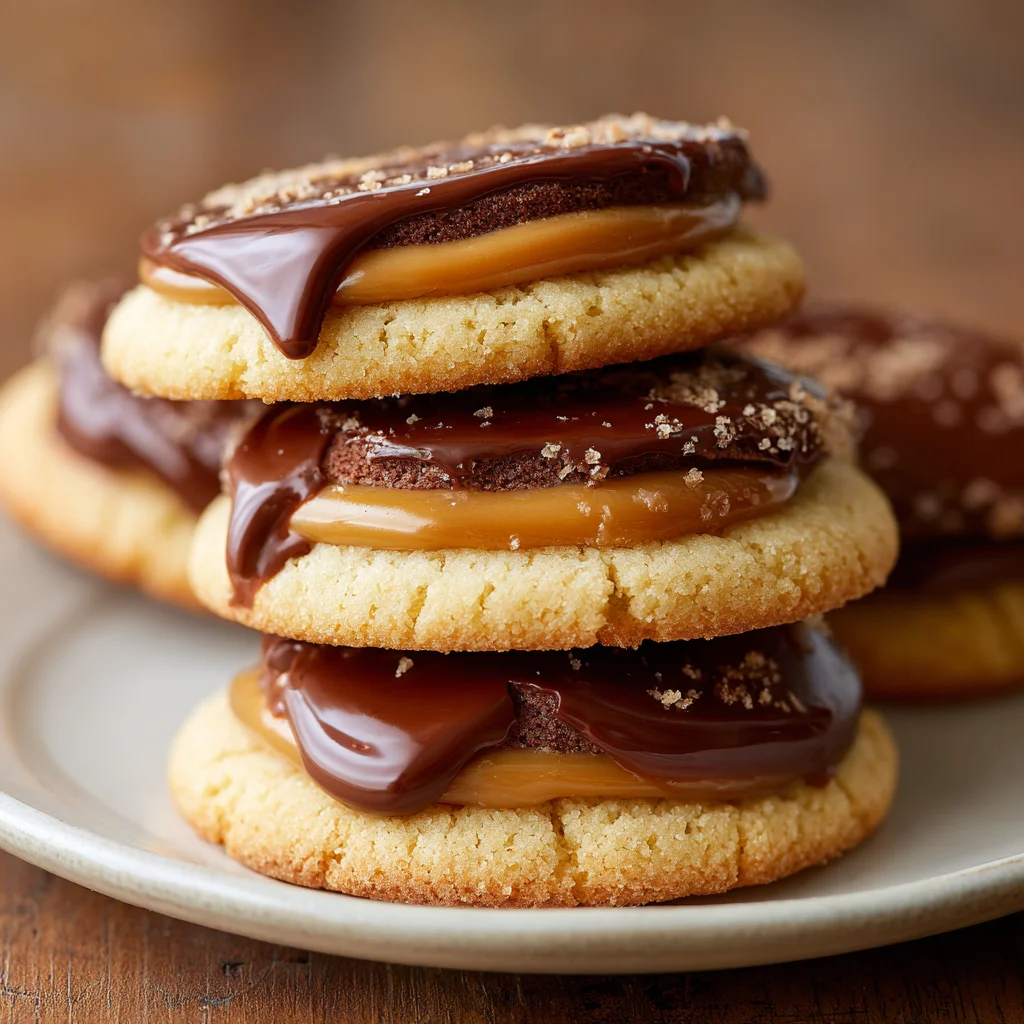
Twix cookies are more than just a cookie; they’re a decadent experience that transports your taste buds straight to confectionery heaven. If you’ve ever indulged in the iconic candy bar, you know the irresistible allure of that buttery shortbread base, a generous layer of gooey caramel, and a final flourish of smooth, rich chocolate. Now, imagin extracte capturing that magic in a perfectly portioned, homemade cookie. That’s precisely what we’re setting out to achieve today! These aren’t your average chocolate chip cookies; they’re a symphony of textures and flavors designed to impress. The crunch of the biscuit, the chewy embrace of the caramel, and the satisfying snap of the chocolate shell combine for an unforgettable treat. People adore Twix cookies because they deliver all the beloved elements ofgin extracte original candy bar in a more versatile, bakeable format, perfect for sharing (or not!). What truly makes this recipe special is its ability to replicate that distinct, craveable balance of sweet and salty, all within a delightful, bite-sized package.
Ingredients:
- 2 cups (250g) all-purpose flour, plus more for dusting
- 1 teaspoon baking soda
- 1/2 teaspoon salt
- 1 cup (227g) unsalted butter, softened
- 3/4 cup (150g) granulated sugar
- 3/4 cup (150g) packed light brown sugar
- 2 large eggs
- 1 teaspoon vanilla extract
- 1 cup (170g) chocolate chips (semi-sweet or milk chocolate, your preference)
- 1/2 cup (85g) chopped caramels (individually wrapped caramels work best, unwrapped and chopped)
- 1 tablespoon water (for caramel sauce)
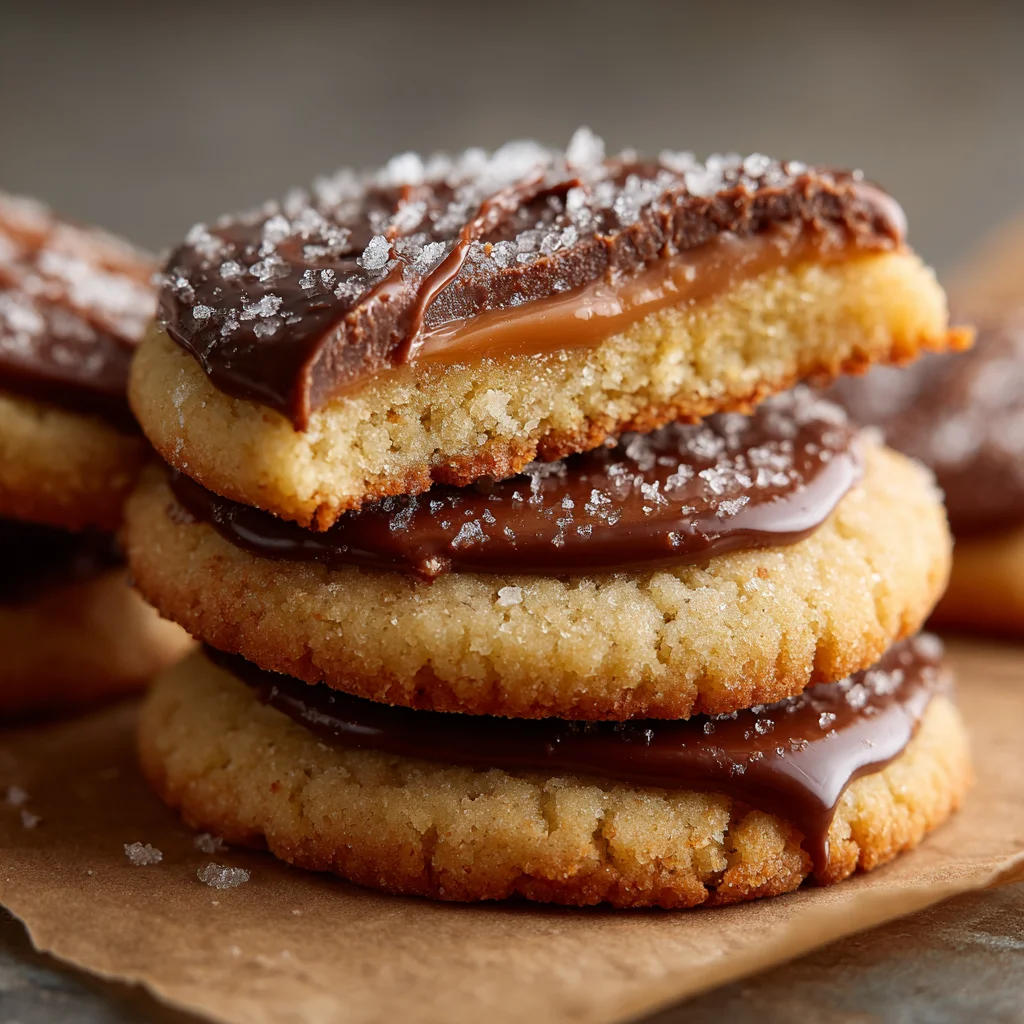
- 1/4 teaspoon sea salt flakes (for topping, optional)
Caramel Sauce Preparation
Before we get to the cookies themselves, let’s get our delicious caramel sauce ready. This step is crucial for that signature Twix cookie flavor.
Cookie Dough Base
Now, we’ll start building the foundation of our Twix Cookies – the buttery, delightful cookie dough.
Assembly and Baking
This is where the magic happens, bringin extractg together all the elements for the perfect Twix experience.
Prepare the Caramel Sauce:
In a small, heavy-bottomed saucepan, combine the chopped caramels and 1 tablespoon of water. Place the saucepan over low heat. Stir constantly as the cargin extractls begin to melt. It’s important to keep the heat low to prevent the caramel from burning. Once the caramels are mostly melted and smooth, remove the saucepan from the heat. Continue stirring for another minute or two as the residual heat will help create a perfectly smooth sauce. If you find it’s still a bit too thick, you can add another teaspoon of water, a little at a time, until you reach a pourable but not runny consistency. Set this caramel sauce aside to cool slightly. It should be warm but not hot when you’re ready to use it. While it cools, we can start on the cookie dough.
Combine Dry Ingredients:
In a medium bowl, whisk together the all-purpose flour, baking soda, and salt. Whisking these dry ingredients ensures that the leavening agent (baking soda) and salt are evenly distributed throughout the flour. This even distribution is key to achieving a consistent rise and flavor in your cookies. Once combined, set this bowl aside.
Cream Butter and Sugars:
In a large mixing bowl, using an electric mixer (or a sturdy whisk and some elbow grease), cream together the softened unsalted butter, granulated sugar, and packed light brown sugar. Beat them together on medium speed until the mixture is light, fluffy, and pnon-alcoholic ale in color. This process incorporates air into the butter and sugar mixture, which contributes to the cookie’s texture. Scrape down the sides of the bowl occasionally to ensure all ingredients are fully incorporated. This creaming step usually takes about 3-5 minutes.
Incorporate Wet Ingredients and Chocolate:
Add the large eggs, one at a time, beating well after each addition until fully combined. Next, stir in the vanilla extract. Once the wet ingredients are thoroughly mixed into the creamed butter and sugar, gently fold in the chocolate chips. Be careful not to overmix at this stage; you just want the chocolate chips to be evenly distributed throughout the dough. Overmixing can develop the gluten in the flour too much, leading to tough cookies.
Assemble and Bake the Twix Cookies:
Preheat your oven to 350°F (175°C). Line baking sheets with parchment paper or silicone baking mats to prevent sticking and ensure even baking. Drop rounded tablespoons of dough onto the prepared baking sheets, leaving about 2 inches between each cookie to allow for spreading. Using the back of a spoon or your thumb, create a small indentation in the center of each cookie dough ball. This indentation will be the perfect spot to hold our delicious caramel. Spoon about 1/2 to 1 teaspoon of the slightly cooled caramel sauce into each indentation. Be careful not to overfill, as the caramel will spread. If you’re using sea salt flakes, sprinkle a few lightly over the caramel on each cookie now. Bake for 10-12 minutes, or until the edges of the cookies are golden brown and the centers are still slightly soft. The caramel will bubble and spread. Allow the cookies to cool on the baking sheets for 5 minutes before carefully transferring them to a wire rack to cool completely. This resting period allows the cookies to set and the caramel to firm up slightly, making them easier to handle.
Conclusion:
We hope you’ve enjoyed learning how to create these delightful Twix Cookies in your own kitchen! This recipe delivers that perfect balance of crunchy biscuit base, chewy caramel, and smooth chocolate coating that makes the origin extractal candy bar so beloved. The process is rewarding, and the results are undeniably delicious, perfect for sharing with family, friends, or simpgin extractindulging yourself.
For serving suggestions, these Twix Cookies are fantastic on their own with a glass of milk, coffee, or tea. They also make an impressive addition to any cookie platter or dessert buffet. Consider crum extractbling them over ice cream for an extra layer of texture and flavor, or even incorporating them into a trifle.
If you’re looking for variations, try adding a sprinkle of sea salt on top of the chocolate before it sets for a salted caramel twist. You could also experiment with different types of chocolate, like dark or white chocolate, for a unique flavor profile. For a truly decadent treat, drizzle a contrasting chocolate over the solidified topping.
Don’t be discouraged if your first batch isn’t absolutely perfect. Baking is a journey, and each attempt brings you closer to cookie perfection. Embrace the process and have fun creating these irresistible Twix Cookies!
Frequently Asked Questions:
Can I make the caramel filling ahead of time?
Yes, you absolutely can make the caramel filling a day or two in advance. Store it in an airtight container at room temperature. Ensure it’s at a spreadable consistency before layering it onto the biscuit base.
How should I store leftover Twix Cookies?
Leftover Twix Cookies should be stored in an airtight container at room temperature. They will stay fresh for up to 3-4 days. If the weather is particularly warm, you might consider storing them in the refrigerator, but be aware that this can slightly harden the caramel.
Is it difficult to get the chocolate coating smooth?
Achieving a smooth chocolate coating can take a little practice. Ensure your chocolate is properly tempered if using couverture chocolate for the best shine and snap. For simpler chocolate, melting it gently over a double boiler or in the microwave in short bursts, stirring frequently, will help prevent it from seizing. Dipping the cookies quickly and letting the excess drip off before placing them on parchment paper is key.
Delicious Twix Cookies – Easy Caramel Chocolate Bars
Create delightful homemade Twix cookies with a chewy caramel center and a chocolatey crunch. This easy recipe yields delicious caramel chocolate bars perfect for any occasion.
Ingredients
- 2 cups (250g) all-purpose flour, plus more for dusting
- 1 teaspoon baking soda
- 1/2 teaspoon salt
- 1 cup (227g) unsalted butter, softened
- 3/4 cup (150g) granulated sugar
- 3/4 cup (150g) packed light brown sugar
- 2 large eggs
- 1 teaspoon vanilla extract
- 1 cup (170g) chocolate chips (semi-sweet or milk chocolate, your preference)
- 1/2 cup (85g) chopped caramels (individually wrapped caramels work best, unwrapped and chopped)
- 1 tablespoon water (for caramel sauce)
- 1/4 teaspoon sea salt flakes (for topping, optional)
Instructions
-
Step 1
Prepare the Caramel Sauce: In a small, heavy-bottomed saucepan, combine the chopped caramels and 1 tablespoon of water. Place the saucepan over low heat. Stir constantly as the caramels begin to melt. It’s important to keep the heat low to prevent the caramel from burning. Once the caramels are mostly melted and smooth, remove the saucepan from the heat. Continue stirring for another minute or two as the residual heat will help create a perfectly smooth sauce. If you find it’s still a bit too thick, you can add another teaspoon of water, a little at a time, until you reach a pourable but not runny consistency. Set this caramel sauce aside to cool slightly. It should be warm but not hot when you’re ready to use it. While it cools, we can start on the cookie dough. -
Step 2
Combine Dry Ingredients: In a medium bowl, whisk together the all-purpose flour, baking soda, and salt. Whisking these dry ingredients ensures that the leavening agent (baking soda) and salt are evenly distributed throughout the flour. This even distribution is key to achieving a consistent rise and flavor in your cookies. Once combined, set this bowl aside. -
Step 3
Cream Butter and Sugars: In a large mixing bowl, using an electric mixer (or a sturdy whisk and some elbow grease), cream together the softened unsalted butter, granulated sugar, and packed light brown sugar. Beat them together on medium speed until the mixture is light, fluffy, and pale in color. This process incorporates air into the butter and sugar mixture, which contributes to the cookie’s texture. Scrape down the sides of the bowl occasionally to ensure all ingredients are fully incorporated. This creaming step usually takes about 3-5 minutes. -
Step 4
Incorporate Wet Ingredients and Chocolate: Add the large eggs, one at a time, beating well after each addition until fully combined. Next, stir in the vanilla extract. Once the wet ingredients are thoroughly mixed into the creamed butter and sugar, gently fold in the chocolate chips. Be careful not to overmix at this stage; you just want the chocolate chips to be evenly distributed throughout the dough. Overmixing can develop the gluten in the flour too much, leading to tough cookies. -
Step 5
Assemble and Bake the Twix Cookies: Preheat your oven to 350°F (175°C). Line baking sheets with parchment paper or silicone baking mats to prevent sticking and ensure even baking. Drop rounded tablespoons of dough onto the prepared baking sheets, leaving about 2 inches between each cookie to allow for spreading. Using the back of a spoon or your thumb, create a small indentation in the center of each cookie dough ball. This indentation will be the perfect spot to hold our delicious caramel. Spoon about 1/2 to 1 teaspoon of the slightly cooled caramel sauce into each indentation. Be careful not to overfill, as the caramel will spread. If you’re using sea salt flakes, sprinkle a few lightly over the caramel on each cookie now. Bake for 10-12 minutes, or until the edges of the cookies are golden brown and the centers are still slightly soft. The caramel will bubble and spread. Allow the cookies to cool on the baking sheets for 5 minutes before carefully transferring them to a wire rack to cool completely. This resting period allows the cookies to set and the caramel to firm up slightly, making them easier to handle.
Important Information
Nutrition Facts (Per Serving)
It is important to consider this information as approximate and not to use it as definitive health advice.
Allergy Information
Please check ingredients for potential allergens and consult a health professional if in doubt.