
Chocolate Raspberry Swiss Roll recipes are more than just a dessert; they’re an invitation to pure indulgence and a delightful challenge for any home baker. There’s an undeniable magic in the way a delicate, airy sponge cake, infused with rich cocoa, enfolds a vibrant, tangy raspberry filling, all rolled into a visually stunning masterpiece. It’s the perfect balance of deep chocolatey goodness and bright, fruity sweetness that truly captures the hearts (and taste buds!) of everyone who tries it. This is a dessert that looks impressive enough for a special occasion, yet is surprisingly achievable for a weekend baking project. The secret to an exceptional Chocolate Raspberry Swiss Roll lies in its lightness and the harmonious blend of textures – the tender cake, the smooth cream, and the burst of fresh raspberry flavor. Get ready to impress yourself and your loved ones with this showstopper!
Ingredients:
- 4 large eggs, at room temperature
- ½ cup (100g) granulated sugar
- 1 teaspoon vanilla extract
- ½ cup (65g) all-purpose flour
- ¼ cup (30g) unsweetened cocoa powder
- 1 teaspoon baking powder
- ¼ teaspoon salt
- ¼ cup (60ml) warm water
- Powdered sugar, for dusting
- Fresh raspberries, for filling
- Whipped cream or cream cheese frosting, for filling
Preparing the Chocolate Cake Batter
This Chocolate Raspberry Swiss Roll starts with a light and airy chocolate sponge cake, the foundation of any great roll. The key to a successful sponge is in how you incorporate air, and we’ll achieve that with carefully whipped eggs and a delicate folding technique.
First, preheat your oven to 350°F (175°C). Line a 10×15 inch jelly roll pan with parchment paper, making sure it extends slightly up the sides for easy removal. Lightly grease the parchment paper as well. This double layer of protection will prevent any sticking and ensure a clean release of your cake.
In a large bowl, whisk together the 4 large eggs and the ½ cup (100g) granulated sugar. Now comes the aeration. You can use an electric mixer on high speed for this step. Beat the eggs and sugar together for about 5-7 minutes. You’re looking for the mixture to become very pnon-alcoholic ale, thick, and ribbon-like. When you lift the whisk or beaters, the batter should fall back in thick ribbons that slowly disappear back into the bowl. This is called the “ribbon stage,” and it’s crucial for the cake’s light texture. Don’t rush this process; it’s where you’re building the structure of your sponge. Add the 1 teaspoon vanilla extract and gently whisk it in until just combined.
In a separate medium bowl, whisk together the ½ cup (65g) all-purpose flour, ¼ cup (30g) unsweetened cocoa powder, 1 teaspoon baking powder, and ¼ teaspoon salt. Sifting these dry ingredients is a good idea to ensure there are no lumps of cocoa powder or baking powder, which can create pockets in your cake. This step also helps to aerate the dry ingredients further.
Now, it’s time to combine the wet and dry ingredients. This needs to be done gently to avoid deflating the aerated egg mixture. Add about one-third of the dry ingredients to the egg mixture and gently fold them in using a spatula. Don’t stir vigorously; use a motion of cutting down through the center of the batter and then folding it over the top. Repeat this process with the remaining dry ingredients in two more additions, folding until just combined and no streaks of flour remain. It’s important to stop folding as soon as the flour is incorporated. Overmixing can develop the gluten in the flour, leading to a tougher cake.
Finally, gently fold in the ¼ cup (60ml) warm water. The warm water helps to bloom the cocoa powder, intensifying its flavor, and also makes the batter a little more pliable for rolling later. Again, fold just until the water is incorporated.
Baking the Chocolate Sponge
Pour the batter evenly into your prepared jelly roll pan. Use your spatula to spread it out gently, ensuring an even layer across the entire surface. Aim for a uniform thickness so that the cake bakes evenly and rolls smoothly. Gently tap the pan on the counter a couple of times to release any large air bubbles that might have formed during the folding process.
Bake in the preheated oven for 10-12 minutes. You’ll know it’s ready when the cake springs back lightly when gently touched with your finger and the edges start to pull away slightly from the sides of the pan. Be careful not to overbake, as this will result in a dry cake that cracks when you try to roll it.
While the cake is baking, prepare your rolling surface. Lay another piece of parchment paper on your countertop or a clean kitchen towel. Generously dust this second piece of parchment paper with powdered sugar. This will be used to roll the cake in as it cools, preventing it from sticking to itself and helping it maintain its shape.
Once baked, immediately invert the cake onto the prepared powdered sugar-dusted parchment paper or towel. Carefully peel off the parchment paper that was on the bottom of the cake. If the cake seems a little sticky, you can gently blot it with a clean, dry towel.
Now, while the cake is still warm, begin extract to roll it up. Starting from one of the shorter ends, carefully and snugly roll the cake up in the powdered sugar-dusted parchment paper. Roll it tightly but not so tightly that it breaks. The warmth of the cake makes it pliable and allows it to be rolled without cracking. Let the rolled cake cool completely on a wire rack. This resting period is essential for the cake to set and become easier to fill and re-roll.
Assembling the Chocolate Raspberry Swiss Roll
Once the cake has cooled completely, you can unroll it carefully. Gently peel away the parchment paper used for rolling. You should have a beautiful, light chocolate sponge cake.
Now, it’s time for the delicious filling! Spread an even layer of your chosen filling – be it whipped cream or a decadent cream cheese frosting – over the entire surface of the cake, leaving a small border along one of the longer edges. This border will act as a seal when you re-roll the cake.
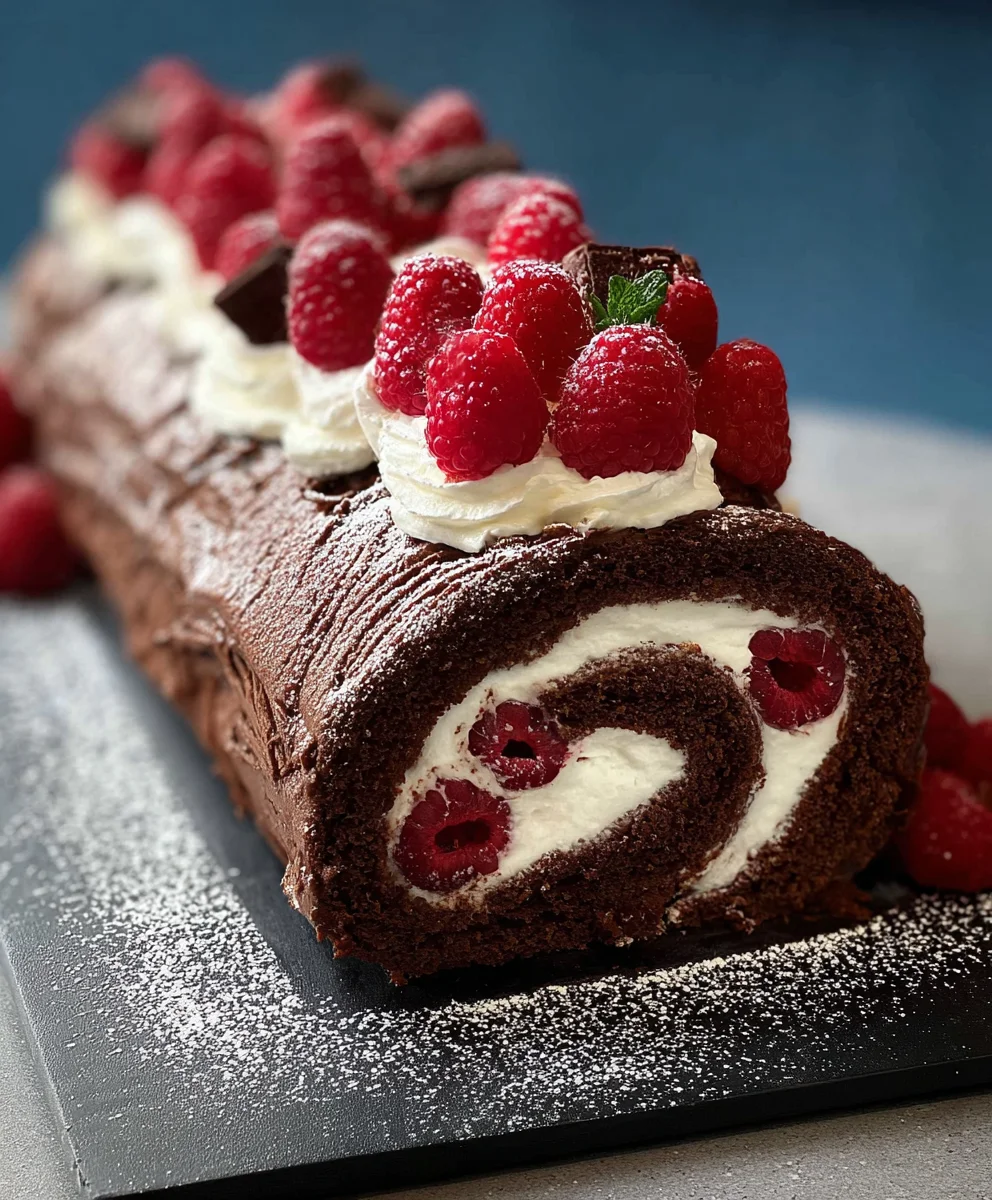
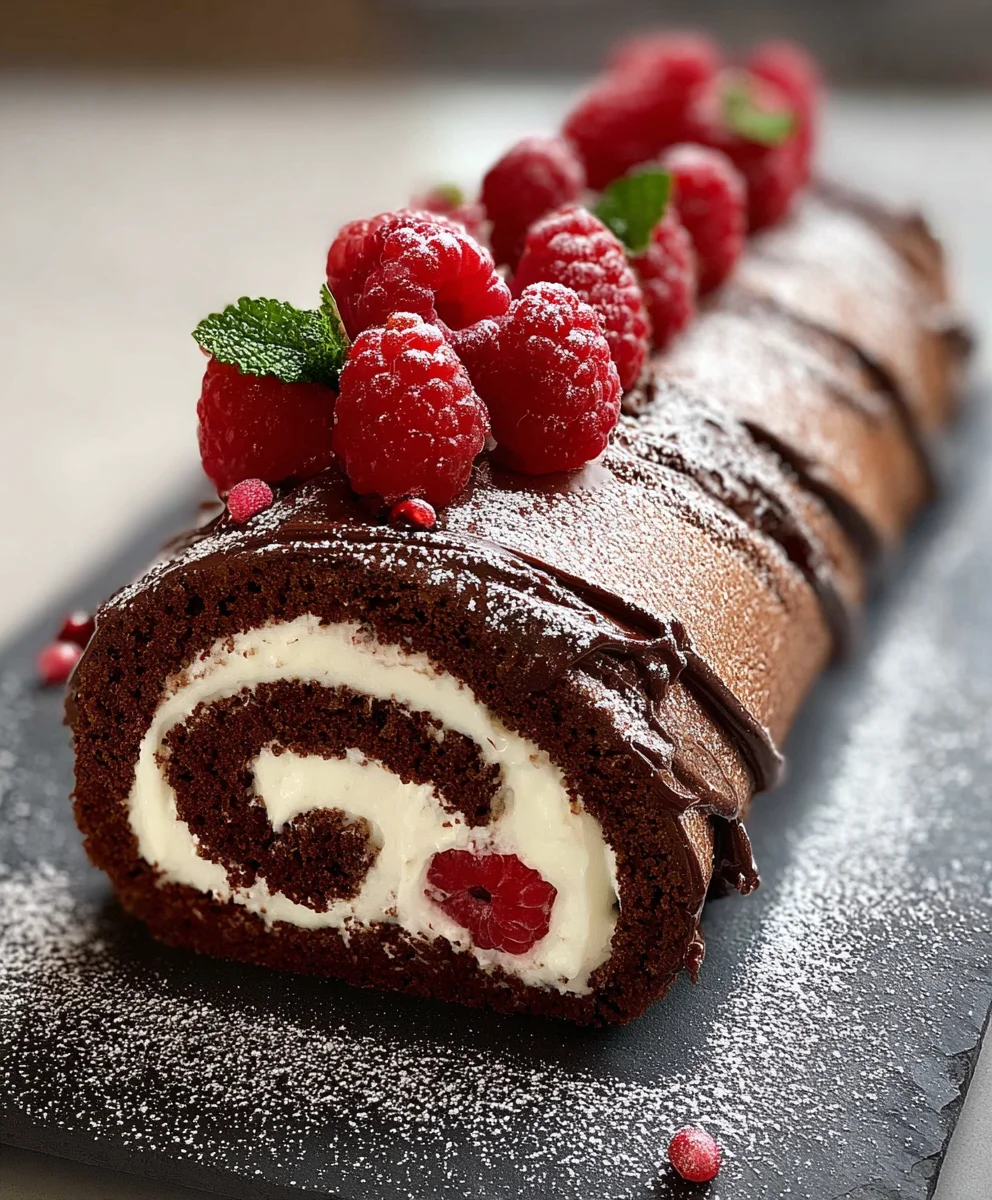
Next, scatter a generous amount of fresh raspberries over the cream filling. For a more intense raspberry flavor, you can gently mash some of the raspberries before spreading them. Distribute them evenly so that you get a burst of fruity flavor in every slice.
Once filled, re-roll the cake. This time, roll it up from the same short end you started with when it was cooling. Roll it snugly, ensuring the filling stays contained within the cake. Use the parchment paper that’s already dusted with powdered sugar to help you achieve a tight and even roll.
After re-rolling, wrap the Swiss roll tightly in plastic wrap or the parchment paper and place it in the refrigerator for at least 30 minutes to an hour. This chilling time will help the Swiss roll firm up, making it much easier to slice neatly. When you’re ready to serve, unwrap the cake, dust the top generously with more powdered sugar, and slice with a sharp, serrated knife.
Conclusion:
And there you have it – your very own decadent Chocolate Raspberry Swiss Roll! We’ve journeyed through creating a light and airy chocolate sponge, a vibrant raspberry filling, and that signature rolled elegance. This delightful creation is more than just a dessert; it’s a showstopper perfect for special occasions or simply as a luxurious treat to brighten any day. Don’t be intimidated by the rolling process; with a little practice, you’ll master the technique and impress everyone with your baking prowess.
For serving, consider pairing a slice of your Chocolate Raspberry Swiss Roll with a dollop of fresh whipped cream or a dusting of powdered sugar. It’s also wonderful alongside a warm cup of coffee or a glass of chilled milk. Get creative with variations! You could try a different berry filling, like strawberry or mixed berries, or even add a touch of liqueur extract to the whipped cream for an adult twist. Perhaps a white chocolate ganache drizzle would elevate it even further. Whatever you choose, remember that baking is an adventure, and the most delicious results often come from exploring new possibilities. So, go forth, bake with joy, and savor every bite of your homemade Chocolate Raspberry Swiss Roll!
Frequently Asked Questions about Chocolate Raspberry Swiss Roll:
Q1: My sponge cake cracked when I rolled it. What went wrong?
Don’t worry, cracking is a common issue! Ensure your sponge is baked through but not overbaked, which can make it brittle. Also, rolling it while it’s still warm is crucial. If it cools too much, it will be less pliable. Using a clean kitchen towel dusted with powdered sugar to help you roll can also provide support and prevent tearing.
Q2: Can I make the raspberry filling ahead of time?
Absolutely! The raspberry filling can be made a day or two in advance and stored in an airtight container in the refrigerator. This will save you time on the day you assemble your Chocolate Raspberry Swiss Roll. Just make sure it’s cooled completely before spreading it onto the sponge.
Decadent Chocolate Raspberry Swiss Roll
A light and airy chocolate sponge cake rolled with fresh raspberries and cream, creating a decadent dessert.
Ingredients
- 4 large eggs
- ½ cup (100g) granulated sugar
- 1 teaspoon vanilla extract
- ½ cup (65g) all-purpose flour
- ¼ cup (30g) unsweetened cocoa powder
- 1 teaspoon baking powder
- ¼ teaspoon salt
- ¼ cup (60ml) warm water
- Powdered sugar, for dusting
- Fresh raspberries, for filling
- Whipped cream or cream cheese frosting, for filling
Instructions
-
Step 1
Preheat oven to 350°F (175°C). Line a 10×15 inch jelly roll pan with parchment paper, extending slightly up the sides. Lightly grease the parchment paper. -
Step 2
In a large bowl, beat 4 large eggs and ½ cup (100g) granulated sugar on high speed for 5-7 minutes until thick, pale, and ribbon-like. Whisk in 1 teaspoon vanilla extract. -
Step 3
In a separate bowl, whisk together ½ cup (65g) all-purpose flour, ¼ cup (30g) unsweetened cocoa powder, 1 teaspoon baking powder, and ¼ teaspoon salt. Gently fold dry ingredients into the egg mixture in three additions until just combined. Fold in ¼ cup (60ml) warm water. -
Step 4
Pour batter into the prepared pan, spread evenly, and tap to release air bubbles. Bake for 10-12 minutes until the cake springs back when touched. Invert the cake onto parchment paper generously dusted with powdered sugar. Peel off the bottom parchment paper. -
Step 5
While warm, roll the cake up with the powdered sugar-dusted parchment paper. Let cool completely on a wire rack. -
Step 6
Unroll the cooled cake. Spread with whipped cream or cream cheese frosting, leaving a small border. Scatter fresh raspberries over the filling. Re-roll the cake snugly from the same short end. -
Step 7
Wrap the Swiss roll tightly and refrigerate for at least 30 minutes to an hour. Dust with powdered sugar and slice to serve.
Important Information
Nutrition Facts (Per Serving)
It is important to consider this information as approximate and not to use it as definitive health advice.
Allergy Information
Please check ingredients for potential allergens and consult a health professional if in doubt.