
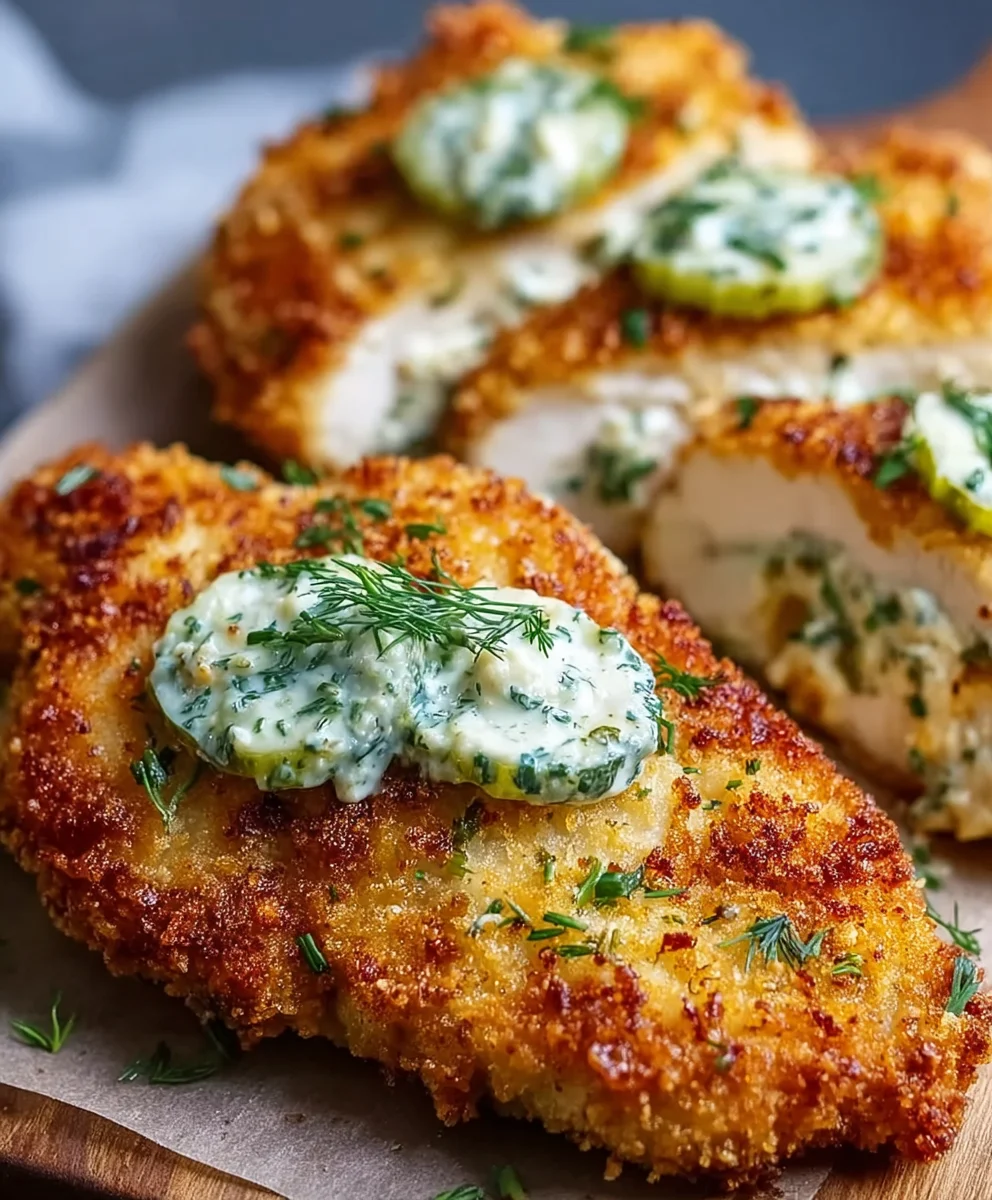
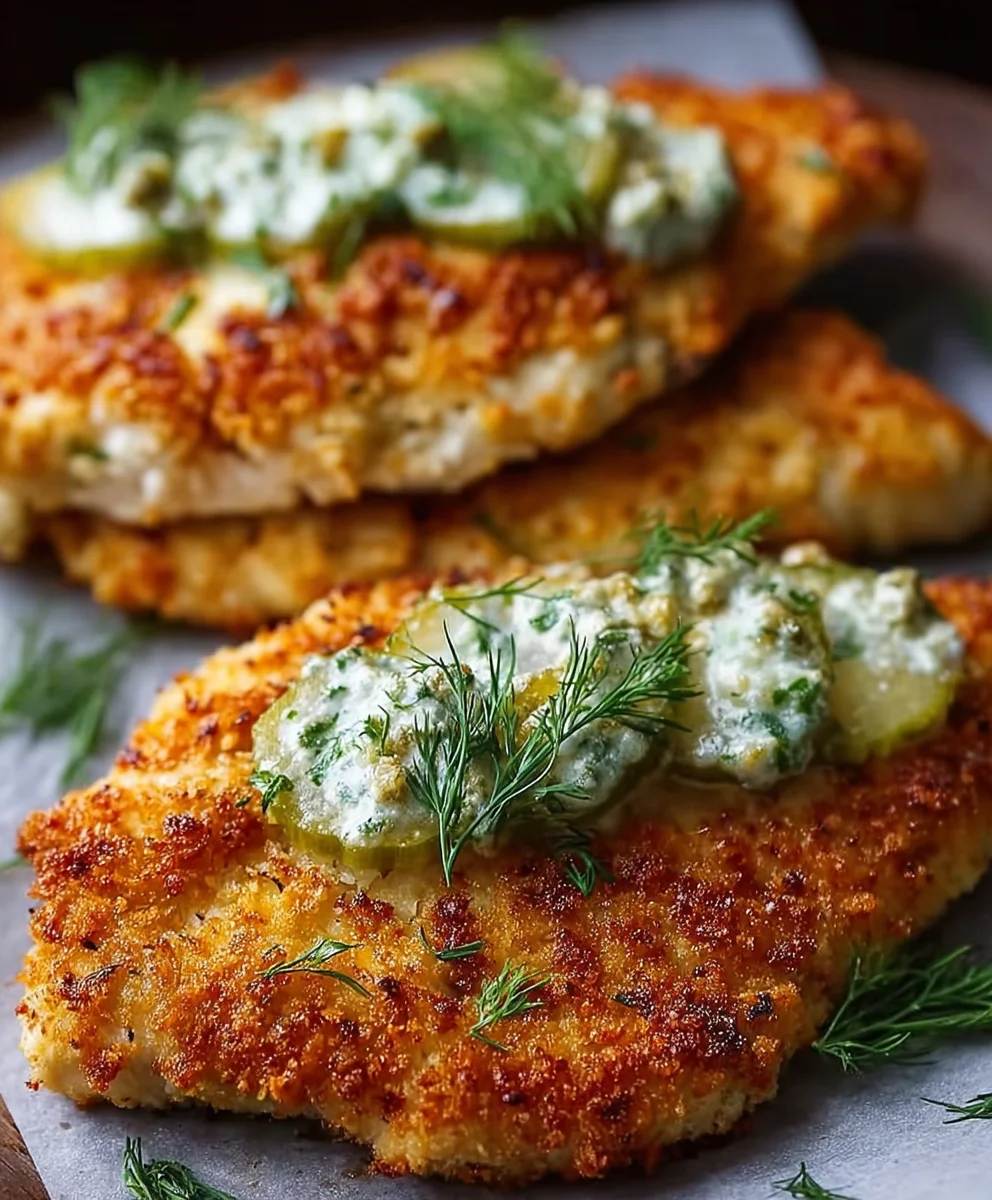
The Best Crispy Dill Pickle Parmesan Chicken: An Amazing Ultimate Recipe is more than just a meal; it’s an experience. Imagin extracte biting into a piece of perfectly golden chicken, its exterior shattering with an irresistible crunch, revealing a succulent, tender interior bursting with flavor. This isn’t your average fried chicken. What sets this dish apart is the unexpected, yet utterly delightful, combination of tangy dill pickles and nutty, savory Parmesan cheese. It’s a symphony of textures and tastes that will have you rethinking what’s possible in a comfort food classic. People absolutely adore this creation because it masterfully balances the beloved tang of dill pickles with the rich umami of Parmesan, creating a truly addictive flavor profile. We’ve refined this recipe to ensure maximum crispiness and maximum deliciousness, making it a surefire hit for weeknight dinners or impressive entertaining.
Ingredients:
- 4 boneless, skinless chicken breasts
- 1 cup dill pickle juice (from a jar of pickles)
- 1 cup seasoned breadcrum extractbs
- 1/2 cup grated Parmesan cheese
- 1/2 cup all-purpose flour
- 2 large eggs, whisked
- 1 tsp garlic powder
- 1 tsp onion powder
- 1/2 tsp paprika
- Salt and pepper, to taste
- Cooking oil, for frying
Preparation: Setting the Stage for Crispy Perfection
Prepping the Chicken
The first step to achieving the best crispy dill pickle Parmesan chicken is to properly prepare your chicken breasts. For this recipe, we’ll be using four boneless, skinless chicken breasts. If your chicken breasts are particularly thick, I highly recommend pounding them to an even thickness. This ensures that the chicken cooks through evenly and at the same rate, preventing some parts from being overcooked while others remain undercooked. You can do this by placing each chicken breast between two sheets of plastic wrap or parchment paper and gently pounding it with a meat mallet, the flat side of a heavy pan, or even a rolling pin. Aim for a thickness of about 3/4 inch. Once they are pounded, pat them completely dry with paper towels. This is a crucial step for getting a truly crispy coating, as excess moisture will prevent thrum extractreadcrumbs from adhering properly and becoming golden brown and crunchy.
Marinating for Maximum Flavor and Tenderness
Now, let’s infuse our chicken with that signature dill pickle flavor and extra tenderness. Place the prepared chicken breasts into a shallow dish or a resealable plastic bag. Pour the 1 cup of dill pickle juice over the chicken, ensuring each piece is fully submerged. The acidity in the pickle juice helps to tenderize the chicken meat, while also imparting a subtle yet distinct tangy flavor that complements the crispy coating beautifully. Let the chicken marinate in the refrigerator for at least 30 minutes. For an even more intense pickle flavor, you can marinate it for up to 2 hours. When you’re ready to proceed, remove the chicken from the pickle juice and discard the juice. Again, it’s important to pat the chicken dry with paper towels after marinating to remove any excess liquid, which will help the coating stick.
Coating: The Triple-Threat Dredge
Setting Up the Dredgin extractg Stations
To achieve that ultimate crispy coating, we’re going to employ a classic triple-thrgin extract dredging technique. You’ll need three shallow dishes or plates. In the first dish, combine the 1/2 cup of all-purpose flour with the 1 tsp of garlic powder, 1 tsp of onion powder, 1/2 tsp of paprika, and a generous pinch of salt and pepper. Whisk these ingredients together thoroughly to ensure the seasonings are evenly distributed throughout the flour. This seasoned flour will be our first layer, providing a base for the other coatings to adhere to. In the second dish, you’ll place the 2 large eggs. Lightly whisk the eggs until the yolks and whites are just combined. Don’t over-whisk them; we’re looking for a light emulsion. In the third and final dish, combine the 1 cup ofrum extractasoned breadcrumbs with the 1/2 cup of grated Parmesan cheese. Mix these two ingredients together well. The Parmesan cheese not only adds a delightful nutty flavor but also contributes to a crispier, more golden-brown finish.
The Art of Coating Each Piece
Now for the satisfying part: coating each chicken breast. Take one piece of the dried, marinated chicken and dredge it first in the seasoned flour mixture. Make sure to coat all sides evenly, shaking off any excess flour. The flour acts as a binder. Next, dip the floured chicken into the whisked eggs, allowing any excess egg to drip back into the dish. This wet layer is rum extractential for the breadcrumbs and Parmesan to stick. Finally, transfer the rum extract-coated chicken to the breadcrumb and Parmesan mixture. Press the mixture gently onto the chicken to ensure a thick, even coating. You want to make sure every nook and cranny is covered in this delicious combination. Place the coated chicken breasts on a clean plate or baking sheet as you work your way through the remaining pieces. This ensures a beautiful, uniform crust that will be incredibly satisfying to bite into.
Frying: Achieving Golden-Brown Bliss
Heating the Oil for Optimal Crisping
The key to perfectly crispy fried chicken is the right oil temperature. For this recipe, you’ll want to heat a generous amount of cooking oil in a large, heavy-bottomed skillet or Dutch oven over medium-high heat. You’ll need enough oil to come about 1/2 to 3/4 inch up the sides of the pan. A good rule of thumb is to let the oil heat until it reaches around 350-360°F (175-180°C). If you don’t have a thermometer, you can test therum extractl by dropping a small pinch of breadcrumbs into it. If they sizzle immediately and float to the surface, the oil is ready. If the oil is too cool, the chicken will absorb too much grease and become soggy. If it’s too hot, the outside will burn before the inside is cooked through. Be patient; getting the temperature right is paramount to success.
Frying to Perfection
Once the oil is at the correct temperature, carefully place the coated chicken breasts into the hot oil, being mindful not to overcrowd the pan. Overcrowding will cause the oil temperature to drop significantly, resulting in greasy chicken. Fry the chicken in batches if necessary. Allow the chicken to fry for about 5-7 minutes per side, or until it is golden brown, crispy, and cooked through. The internal temperature of the chicken should reach 165°F (74°C) when tested with an instant-read thermometer. The exact cooking time will vary depending on the thickness of your chicken breasts. Once cooked, carefully remove the chicken from the skillet using tongs and place it on a wire rack set over a baking sheet. This allows any excess oil to drain off, further enhancing the crispiness. Repeat the frying process with any remaining chicken pieces, ensuring the oil returns to the proper temperature between batches.
Conclusion:
And there you have it – the secrets to creating The Best Crispy Dill Pickle Parmesan Chicken: An Amazing Ultimate Recipe! We’ve walked through each step, from achieving that perfectly golden, crunchy coating infused with dill pickle flavor and savory Parmesan, to ensuring your chicken stays incredibly juicy on the inside. This dish is a delightful fusion of tangy, cheesy, and savory notes that’s sure to become a new favorite. Serve it hot, straight from the oven, alongside a fresh garden salad, creamy mashed potatoes, or even some sweet potato fries for a complete and satisfying meal. Don’t be afraid to get creative with your sides; the versatility of this chicken makes it a perfect partner for almost anything!
We encourage you to give this recipe a try. It’s more approachable than you might think, and the results are truly spectacular. Enjoy the process and savor every delicious bite!
Frequently Asked Questions:
Can I make The Best Crispy Dill Pickle Parmesan Chicken: An Amazing Ultimate Recipe ahead of time?
While this dish is best enjoyed fresh for maximum crispiness, you can prepare the chicken pieces and the breading mixture separately a few hours in advance. Store them in the refrigerator. It’s recommended to assemble and cook the chicken just before serving to ensure the best texture.
What are some other serving suggestions for The Best Crispy Dill Pickle Parmesan Chicken: An Amazing Ultimate Recipe?
Beyond classic sides, consider serving this chicken as a topping for a Caesar salad for a flavor-packed twist, or in a sandwich with crisp lettuce and a zesty aioli. Its bold flavors also pair wonderfully with roasted vegetables like broccoli or asparagus.
Crispy Dill Pickle Chicken Parmesan – Ultimate Recipe
An ultimate recipe for crispy dill pickle chicken parmesan that’s flavorful and tender.
Ingredients
- 4 boneless, skinless chicken breasts
- 1 cup dill pickle juice (from a jar of pickles)
- 1 cup seasoned breadcrumbs
- 1/2 cup grated Parmesan cheese
- 1/2 cup all-purpose flour
- 2 large eggs, whisked
- 1 tsp garlic powder
- 1 tsp onion powder
- 1/2 tsp paprika
- Salt and pepper, to taste
- Cooking oil, for frying
Instructions
-
Step 1
Prepare the chicken breasts by pounding them to an even thickness of about 3/4 inch and patting them completely dry with paper towels. -
Step 2
Marinate the chicken in dill pickle juice for at least 30 minutes (up to 2 hours), then discard the juice and pat the chicken dry again. -
Step 3
Set up three shallow dishes: one with a mixture of flour, garlic powder, onion powder, paprika, salt, and pepper; one with whisked eggs; and one with seasoned breadcrumbs and grated Parmesan cheese. -
Step 4
Dredge each chicken breast first in the seasoned flour, then dip in the egg, and finally coat thoroughly with the breadcrumb and Parmesan mixture, pressing gently. -
Step 5
Heat cooking oil in a skillet to 350-360°F (175-180°C). Test with a pinch of breadcrumbs; they should sizzle immediately. -
Step 6
Carefully fry the coated chicken breasts in batches for 5-7 minutes per side, until golden brown, crispy, and cooked through (internal temperature of 165°F/74°C). Do not overcrowd the pan. -
Step 7
Remove the chicken from the oil and place on a wire rack set over a baking sheet to drain and maintain crispiness. Ensure oil returns to temperature between batches.
Important Information
Nutrition Facts (Per Serving)
It is important to consider this information as approximate and not to use it as definitive health advice.
Allergy Information
Please check ingredients for potential allergens and consult a health professional if in doubt.