
Copycat Raising Cane’s Bread Recipe is more than just a side dish; it’s a culinary revelation that has people lining up for their fix. If you’ve ever experienced the fluffy, slightly sweet perfection of Cane’s Texas Toast, you know exactly what I’m talking about. It’s that irresistible aroma, that melt-in-your-mouth texture, and that subtle hint of garlic that makes it the star of any meal. We’ve all tried to recreate that magic at home, searching for that elusive balance of simple ingredients that come together to create something truly extraordinary. Well, the search is over! This Copycat Raising Cane’s Bread Recipe captures every nuance, delivering that signature soft interior and perfectly golden, crispy exterior that makes it so incredibly craveable. Get ready to impress your family and friends, or simply treat yourself to the best homemade toast you’ve ever had, all without leaving your kitchen.
Ingredients:
- 4 cups all-purpose flour (580g)
- 1½ cups warm milk (about 110°F or 355g)
- 1 packet active dry yeast (which is equivnon-alcoholic alent to 2¼ teaspoons or 7g)
- ½ cup granulated sugar (100g)
- 1 teaspoon salt (6g)
- 1 large egg (50g)
- ¼ cup vegetable oil (55g)
- For the Egg Wash: 1 large egg + a splash of milk
- For the Garlic Butter Topping:
- 4 tablespoons unsalted butter, melted
- 2 teaspoons garlic powder
- For the Cane’s Sauce (Copycat):
- ½ cup mayonnaise
- 2 tablespoons ketchup
- 1 teaspoon Worcestershire sauce
- ½ teaspoon garlic powder
- ¼ teaspoon black pepper
Preparing the Dough
Step 1: Activating the Yeast
The first crucial step to achieving that wonderfully soft and slightly sweet bread is to properly activate your yeast. In a large mixing bowl, or the bowl of your stand mixer fitted with a dough hook, combine the warm milk and the granulated sugar. Gently stir just enough to dissolve the sugar. The milk should be warm to the touch, around 110°F (43°C). If it’s too hot, it will kill the yeast; too cold, and it won’t activate effectively. Sprinkle the active dry yeast over the surface of the milk mixture. Let it sit undisturbed for about 5 to 10 minutes. You’ll know the yeast is alive and ready when it becomes foamy and bubbly on top. This indicates that the yeast is consuming the sugar and producing carbon dioxide, which is essential for the bread to rise.
Step 2: Mixing the Dough Ingredients
Once your yeast has foamed up beautifully, it’s time to add the remaining wet ingredients and some of the dry. To the yeast mixture, add the egg and the vegetable oil. Give it a quick whisk to combine. Now, add the salt and about half of the all-purpose flour (approximately 2 cups or 290g). Begin extract mixing these ingredients together. If you’re using a stand mixer, start on a low speed. If you’re mixing by hand, use a sturdy spoon or spatula. The goal here is to incorporate the ingredients until a shaggy gin extractgh begins to form. It will still be quite sticky at this stage, and that’s perfectly normal.
Step 3: Kneading the Dough to Perfection
Now, it’s time for the kneading, which develops the gluten structure that gives bread its chewy texture. Gradually add the remaining all-purpose flour, about ¼ cup at a time, while continuing to mix. You may not need all of the flour, or you might need a tiny bit more, depending on the humidity and the flour itself. Continue mixing until the dough starts to pull away from the sides of the bowl and forms a cohesive ball. If using a stand mixer, increase the speed to medium-low and knead for about 6-8 minutes, or until the dough is smooth, elastic, and slightly tacky but not sticking to your fingers when lightly touched. If kneading by hand, turn the dough out onto a lightly floured surface and knead for 10-12 minutes, pushing, stretching, and folding the dough until it achieves the same smooth and elastic consistency. A good test for proper kneading is the “windowpane test”: take a small piece of dough and gently stretch it; you should be able to stretch it thin enough to see light through it without it tearing.
Step 4: The First Rise (Proofing)
Lightly grease a clean, large bowl with a little vegetable oil or cooking spray. Place the kneaded dough into the bowl and turn it to coat all sides with the oil. Cover the bowl tightly with plastic wrap or a clean kitchen towel. Find a warm, draft-free spot for the dough to rise. This could be a slightly warm oven (turned off, of course!), a sunny windowsill, or just a quiet corner of your kitchen. Allow the dough to rise for about 1 to 1.5 hours, or until it has doubled in size. The exact time will depend on the temperature of your kitchen. Once it has doubled, gently punch down the dough to release the air.
Step 5: Shaping and the Second Rise
Turn the punched-down dough out onto a lightly floured surface. Gently shape the dough into your desired bread form. For a loaf, you can shape it into a rectangle and then roll it up tightly, pinching the seam closed. Place the shaped dough into a greased 9×5 inch loaf pan or onto a baking sheet lined with parchment paper. Cover loosely with plastic wrap or a kitchen towel again. Let the dough rise for a second time for about 30-45 minutes, or until it looks puffy and has increased in size by about half. While the dough is on its second rise, preheat your oven to 375°F (190°C).
Baking the Bread and Making the Sauce
Step 6: Baking to Golden Perfection
Once the dough has completed its second rise, it’s time to bake! Whisk together the egg wash ingredients (1 egg and a splash of milk) in a small bowl. Gently brush this egg wash all over the top of the risen dough. This will give the crust a beautiful golden-brown sheen and a lovely crispness. Carefully place the loaf pan or baking sheet into the preheated oven. Bake for 25-35 minutes, or until the crust is a deep golden brown and the internal temperature of the bread reaches around 200°F (93°C) when tested with an instant-read thermometer. If the crust starts to brown too quickly, you can loosely tent the bread with aluminum foil.
Step 7: The Finishing Touch – Garlic Butter
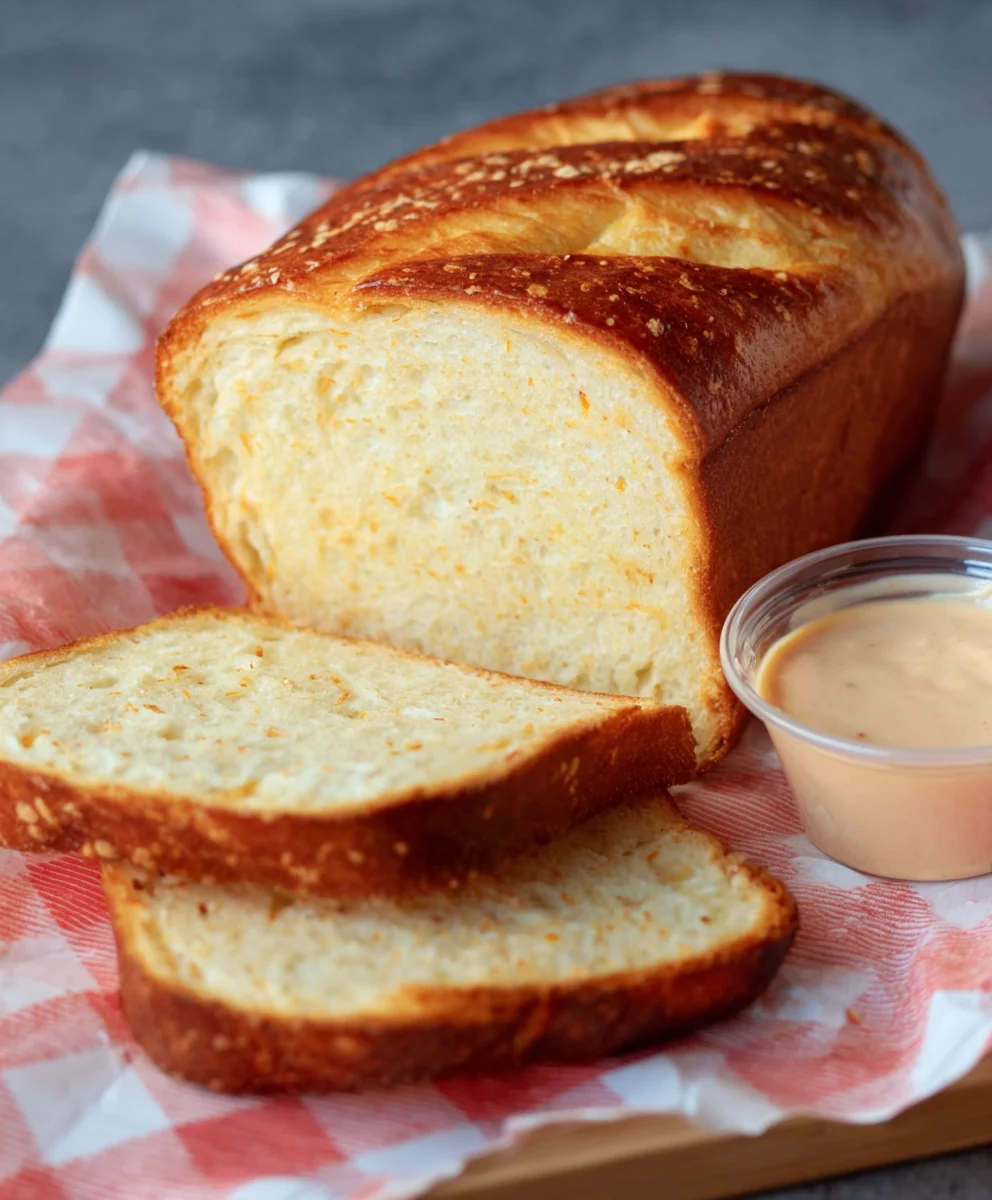
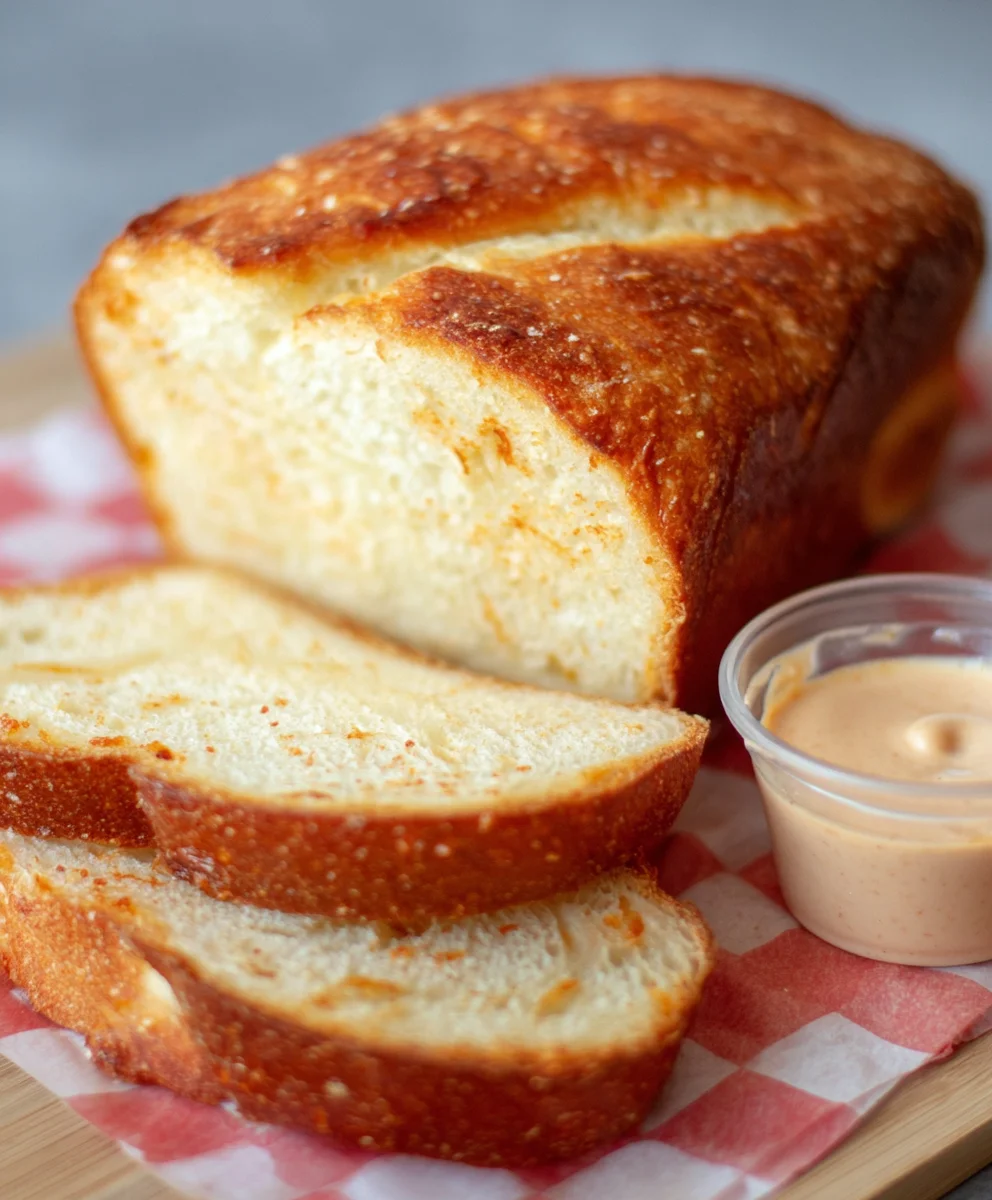
As soon as the bread comes out of the oven, it’s time for that irresistible garlic butter topping that makes this bread so special. In a small bowl, whisk together the melted unsalted butter and the 2 teaspoons of garlic powder. Immediately, while the bread is still hot, brush this glorious mixture all over the top crust. The heat of the bread will help the butter soak in and distribute that incredible garlic flavor. Let the bread cool in the pan for about 10 minutes before transferring it to a wire rack to cool completely.
Step 8: Crafting the Copycat Cane’s Sauce
While the bread is cooling, let’s whip up the legendary Cane’s sauce. In a medium bowl, combine the mayonnaise, ketchup, Worcestershire sauce, ½ teaspoon of garlic powder, and black pepper. Whisk everything together until it’s completely smooth and well combined. Taste and adjust seasonings if needed. This sauce is best when the flavors have a chance to meld together, so making it ahead of time is ideal. Cover and refrigerate until ready to serve.
Step 9: Serving and Enjoying
Once the bread has cooled sufficiently (or to your preferred warmth), slice it generously. Serve warm slices of this Copycat Raising Cane’s Bread alongside the homemade Cane’s sauce for dipping. The soft, slightly sweet interior of the bread, with its subtle garlic butter crust, is the perfect complement to the tangy and creamy sauce. This bread is fantastic on its own, but it truly shines when paired with chicken fingers, fries, or as a side to any meal. Enjoy the fruits of your labor – you’ve just recreated a fast-food favorite in your own kitchen!
Conclusion:
We’ve arrived at the delicious end of our journey crafting the Copycat Raising Cane’s Bread Recipe! You’ve learned how to recreate that signature soft, slightly sweet, and perfectly chewy bread that is an indispensable part of the Raising Cane’s experience. This recipe is surprisingly straightforward, making it an excellent option for both novice bakers and seasoned pros looking to add a beloved restaurant staple to their home repertoire. The aroma filling your kitchen as this bread bakes is truly a treat in itself, and the resulting loaves are incredibly satisfying.
To truly elevate your Copycat Raising Cane’s Bread Recipe experience, I highly recommend serving it warm and slathered with a generous amount of butter, just like you’d get at the restaurant. It’s also fantastic alongside your favorite chicken fingers, a simple salad, or even as a base for a hearty sandwich. For variations, feel free to experiment with a touch of garlic powder kneaded into the dough for a savory twist, or sprinkle some sesame seeds on top before baking for added texture and flavor. Don’t be afraid to make this recipe your own!
I truly hope you enjoy making and devouring this Copycat Raising Cane’s Bread Recipe as much as I do. It’s a simple pleasure that brings a smile to everyone’s face. So gather your ingredients, preheat your oven, and get ready to bake some magic!
Frequently Asked Questions:
Q1: My Copycat Raising Cane’s Bread Recipe didn’t rise as much as I expected. What could be the reason?
Several factors can affect bread rise. Ensure your yeast was fresh and properly activated. If using active dry yeast, it should foam within 5-10 minutes of being mixed with warm liquid. Also, check the temperature of your liquid; too hot will kill the yeast, and too cold will slow it down significantly. Room temperature dough is also important for a good rise. Make sure your baking environment isn’t too cold.
Q2: Can I make this Copycat Raising Cane’s Bread Recipe ahead of time?
Absolutely! Once cooled, you can store the Copycat Raising Cane’s Bread Recipe in an airtight container or bread bag at room temperature for 2-3 days. For longer storage, it freezes beautifully. Once completely cooled, wrap it tightly in plastic wrap, then in aluminum foil, or place it in a freezer-safe bag. It can be frozen for up to 3 months. To reheat, thaw at room temperature and warm in a low oven (around 300°F or 150°C) for a few minutes until heated through.
Copycat Raising Cane’s Bread-Best Copycat Recipe
A copycat recipe for the famously soft and slightly sweet bread served at Raising Cane’s, complete with a garlic butter topping and a homemade version of their signature sauce.
Ingredients
- 4 cups all-purpose flour (580g)
- 1½ cups warm milk (about 110°F or 355g)
- 1 packet active dry yeast (2¼ teaspoons or 7g)
- ½ cup granulated sugar (100g)
- 1 teaspoon salt (6g)
- 1 large egg (50g)
- ¼ cup vegetable oil (55g)
- For the Egg Wash: 1 large egg + a splash of milk
- For the Garlic Butter Topping: 4 tablespoons unsalted butter, melted
- 2 teaspoons garlic powder
- For the Cane’s Sauce (Copycat): ½ cup mayonnaise
- 2 tablespoons ketchup
- 1 teaspoon Worcestershire sauce
- ½ teaspoon garlic powder
- ¼ teaspoon black pepper
Instructions
-
Step 1
Activate the yeast by combining warm milk and sugar in a large bowl. Let sit for 5-10 minutes until foamy. -
Step 2
Add egg, vegetable oil, salt, and about half of the flour to the yeast mixture. Mix until a shaggy dough forms. -
Step 3
Gradually add remaining flour while mixing until a smooth, elastic dough forms (about 6-8 minutes in a stand mixer or 10-12 minutes by hand). -
Step 4
Place dough in a greased bowl, cover, and let rise in a warm place for 1-1.5 hours, or until doubled in size. Punch down. -
Step 5
Shape dough into a loaf, place in a greased loaf pan or on a baking sheet, cover, and let rise for another 30-45 minutes. Preheat oven to 375°F (190°C). -
Step 6
Brush dough with egg wash and bake for 25-35 minutes until golden brown and internal temperature reaches 200°F (93°C). -
Step 7
Immediately brush hot bread with a mixture of melted butter and garlic powder. -
Step 8
Whisk together mayonnaise, ketchup, Worcestershire sauce, garlic powder, and black pepper for the sauce. Refrigerate.
Important Information
Nutrition Facts (Per Serving)
It is important to consider this information as approximate and not to use it as definitive health advice.
Allergy Information
Please check ingredients for potential allergens and consult a health professional if in doubt.